Publish your Android library in 6 easy to follow steps
This is a continuation of my last blog which was about building an Android library. In it, we learned when and why do we need to build a library. In this post, we will understand how do we distribute this cool library we just built and how do we make our library available for other developers to use.
How the distribution of library work on Android
In Android, Gradle is our default build system. In Gradle to include a library, we add the name of a library in the build.gradle file. But, how does it find the library just by including a single line in the build file? The answer is it looks up for the library in some cloud repository and downloads it. One such famous cloud repository is Jcenter and is by default included when we create a new Android Project.
I will be continuing on my project from my last post. We will be publishing our library to JCenter through JFrog Bintray. It provides distribution of open-source libraries for free :)
I. Creating an Account and setting up our Repository on Bintray
- On Bintray scroll to the bottom of the page and click on “For Open Source Plan Sign Up Here”
- Create an account
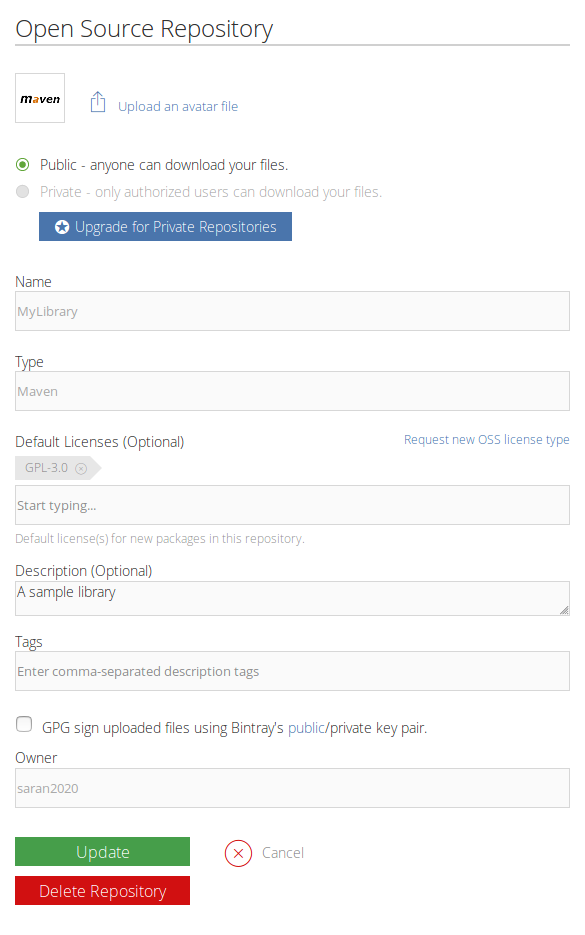
- Click on “Add new Repository” and it will present a page with a form.
- Enter the name for your Repository. It is like a project name.
- Since our library will be used through Gradle which is a Maven-based build system. You need to select “Maven” in the “Type” dropdown.
- Select the Licence under which you want your library to be distributed. (To know which licence to choose, visit choosealicense.com)
- Click on “Create” and you will be taken to the repository page.

INFO: I have only named the mandatory fields.
II. Adding a package to the newly created Repository
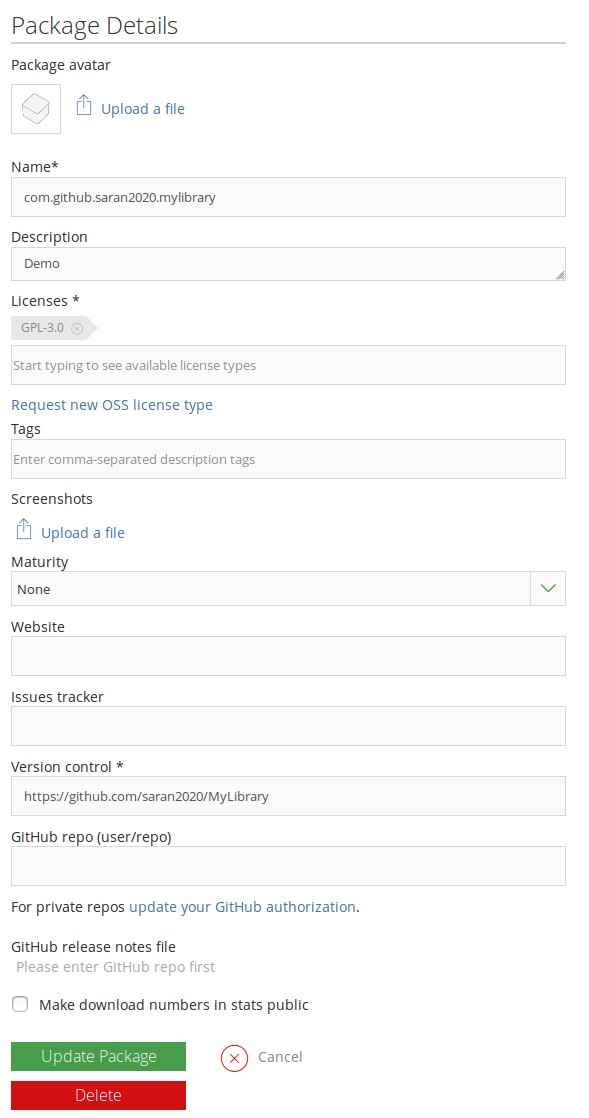
- Click on “Add new Package”
-
Enter a name for the package.
WARNING: This name will be used while including your library into a project by other developers.
INFO: A common convention that developers follow is including their GitHub username in the package name.
i.e:com.github.saran2020.mylibrary - You can choose the same licence which you choose while creating your repository.
- Enter your GitHub project URL into the “Version Control” field.

III. Saving the bintray API key.
Open “Edit Profile” and go to “API Key” section and save the API key somewhere. We will need this API Key when we automate the release of a new version.

We have almost completed setting up our library on Bintray. We will now be moving ahead to automating our release from Android Studio. I have shared a sample project on Github You can go through the commits while following my steps here.
Before continuing to the next section, we need to clear some terms I have used in the below steps.
- RootProject
- is the name of my project. Therefore, RootProject’s build.gradle will mean your projects build.gradle file.
- app
- is the name of my app module. So, “app” module build.gradle will mean your app module’s build.gradle file.
- library
- is the name of my library module. Hence, “library” module build.gradle will mean your library build.gradle file.
IV. Automating release of our library.
- Add Bintray Gradle plugin and maven Gradle plugin to the RootProject
build.gradle(Commit)buildscript { ... dependencies { ... classpath "com.jfrog.bintray.gradle:gradle-bintray-plugin:1.8.4" classpath "com.github.dcendents:android-maven-gradle-plugin:2.1" } } - Add version details to gradle.properties file.
 versionName=0.1
 versionCode=1
We will be referring to these version code when sending out a new release. Making it easier for you to release a new version, without making changes to the
build.gradlefile. - Add Bintray authentication details to
local.propertiesfile.bintray.user=<bintray_username> bintray.gpg.password=<bintray_password> bintray.apikey=<bintray_apikey>You will be replacing the <bintray_username> with your Bintray username, <bintray_password> with your password and <bintray_apikey> with your “API key” from step III above.
WARNING: You need to make sure that
local.propertiesfile is included in the.gitignorefile. Or else you might end up exposing your username password or API Key to GitHub accidentally. - Include upload script to the library
build.gradlefile.repositories { mavenCentral() } // Add these lines to publish library to bintray. This is the readymade scripts made by github user nuuneoi to make uploading to bintray easy. // Place it at the end of the file if (project.rootProject.file('local.properties').exists()) { apply from: 'https://raw.githubusercontent.com/nuuneoi/JCenter/master/installv1.gradle' apply from: 'https://raw.githubusercontent.com/nuuneoi/JCenter/master/bintrayv1.gradle' }This code will be added to the end of the library
build.gradlefile. This is some script created by other developers, which will help us automating our upload. - Configuring the library for upload.
 apply plugin:...

 ext {
 	bintrayRepo = 'MyLibrary'
 	bintrayName = 'com.github.saran2020.mylibrary'

 	libraryName = 'MyLibrary'

 	publishedGroupId = 'com.github.saran2020.mylibrary'
 	artifact = 'MyLibrary'
 	libraryVersion = '1.0'

 	libraryDescription = "Demo"

 	siteUrl = 'https://github.com/saran2020/MyLibrary'
 	gitUrl = 'https://github.com/saran2020/MyLibrary.git'

 	developerId = 'saran2020'
 	developerName = 'Saran Sankaran'
 	developerEmail = 'sands.developer@gmail.com'

 	licenseName = 'GNU GENERAL PUBLIC LICENSE'
 	licenseUrl = 'https://www.gnu.org/licenses/gpl-3.0.en.html'
 	allLicenses = ["GPL-3.0"]
 }

 android {
     ...
 }
Add the above code to the library
build.gradleafter apply plugin and before android section. - Reading the version information from
gradle.propertiesfile, which we added in step 2ext { ... libraryVersion = project.versionName ... } android{ defaultConfig { ... versionCode project.versionCode.toInteger() versionName project.versionName ... } }You need to replace the existing
libraryVersionin theextsection andversionCodeandversionNamein thedefaultConfigsection with the above code.Whenever you want to release a new version, you just need to update the version in
gradle.properties. - Disabling creation of JavaDocs.
 ...
 subprojects {
 	tasks.withType(Javadoc).all { enabled = false }
 }
Add the below code to the last line of RootProject
build.gradlefile. We are disabling the creation of Javadoc becasue, this some times give an error. - Uploading the project
foo@bar:~$ ./gradlew assembleRelease bintrayUploadRun the above command by navigating to the root of your project through Terminal/CMD and wait till the upload finishes.
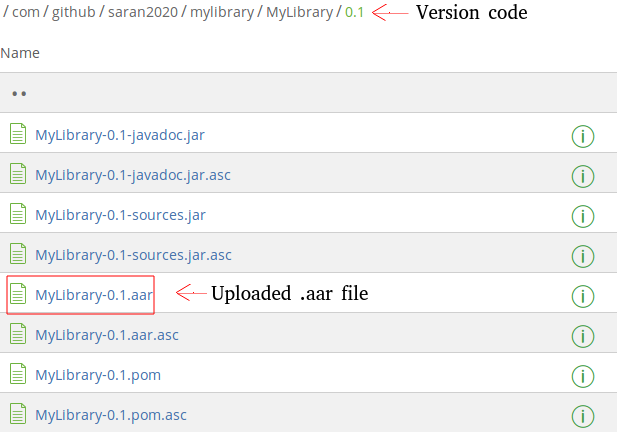
You can verify the upload by going to the Repository -> Package -> Files -> {Version you uploaded} on Bintray dashboard and confirming that an .aar file exists.

V. Making the library available to Developers through JCenter
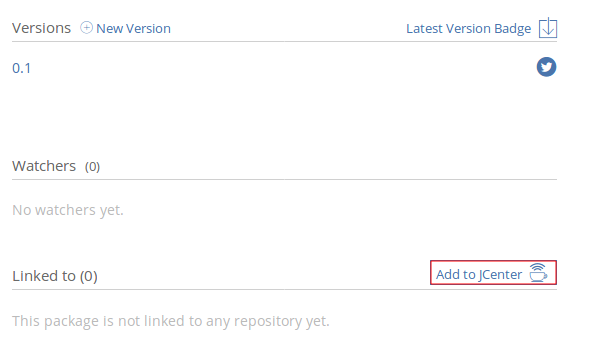
To make your library available to developers you will need to link your library package to Jcenter. You will find the option your package page. To add your library to Jcenter click on “Add to Jcenter”

It will open a page asking for comments. Tick the “is pom project” and add some comment about your project before submitting. It takes up to 24hrs to add your package to JCenter. Once it is added, an E-mail will be sent to you.
INFO: My package was accepted without any comment :)
VI. Releasing a new version of your library
To release a new version, you need to update the version information in the gradle.properties file and run the command.
foo@bar:~$ ./gradlew assembleRelease bintrayUpload
It is a good practice to check if your library has been published properly after every release. To do that, you need to comment out the
implementation project<path: '<Your library name>'>
from the dependencies block and adding the version from the Jcenter which you just published directly like this
implementation 'com.github.saran2020.mylibrary:MyLibrary:0.1'
It is also a good practice to mark every new release of your library on your GitHub repository.
Follow me on Twitter for new updates or for any queries
